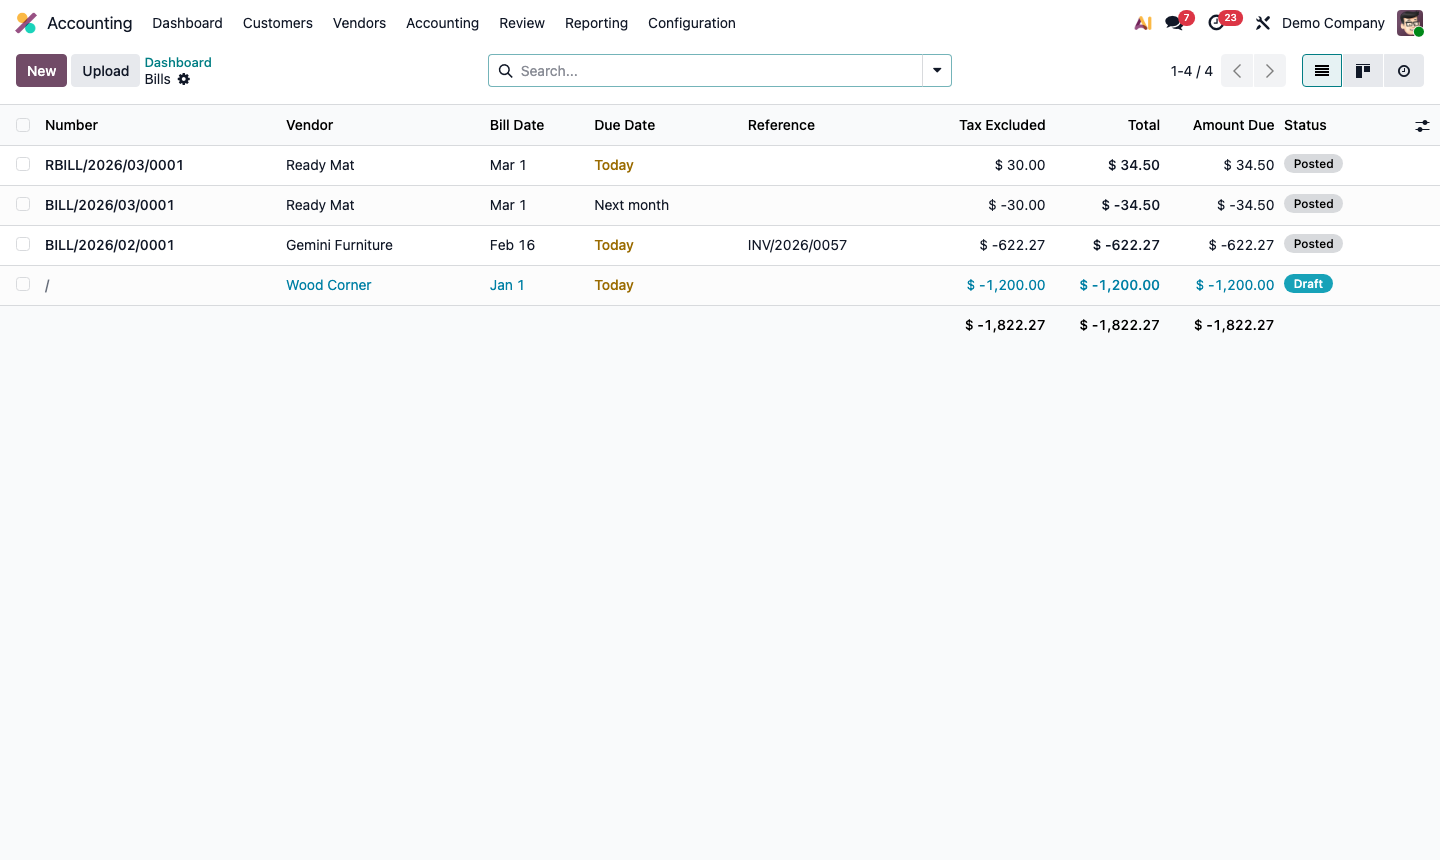
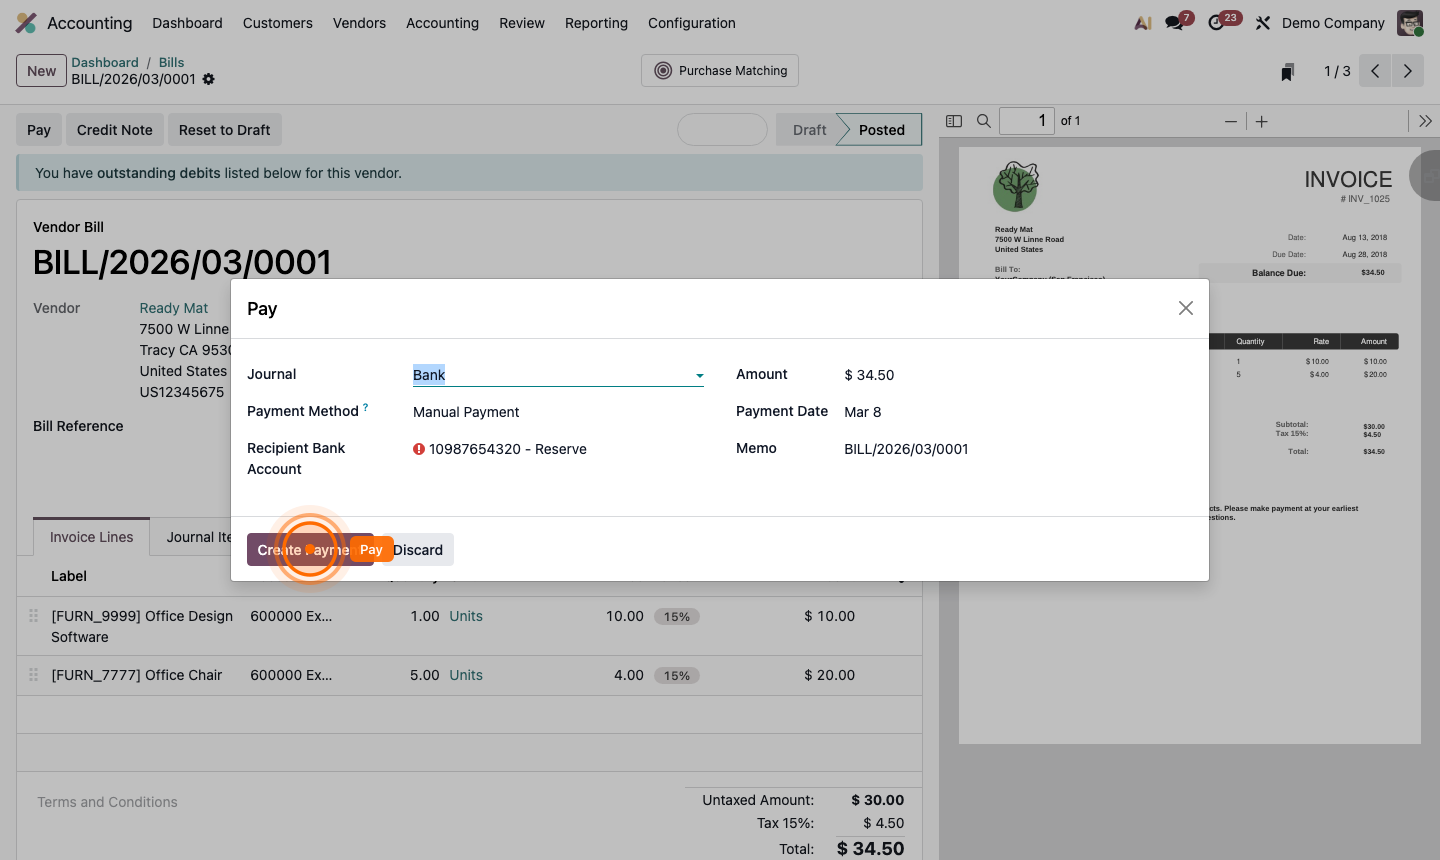
Skip to content
Accounting

Vendor Bills & Payments

Accounting

Vendor Bills & Payments

Process vendor invoices, set up payment terms, schedule due payments, and use AI document scanning to eliminate manual data entry.

7 steps Updated Mar 7, 2026 SOP · Standard

Vendor bill management is the accounts payable side of your accounting. Efficient AP means paying on time (protecting vendor relationships and capturing early payment discounts) without paying early (maximising cash flow). This guide covers the full bill-to-payment cycle.

1

Access Vendor Bills

Go to Accounting → Vendors → Bills.

The default view shows all vendor bills with:

  • Status badges — Draft, Posted, In Payment, Paid, Cancelled
  • Due dates — highlighted in red when overdue
  • Amount Due — remaining balance

Use the Filters dropdown to quickly find:

  • Overdue — bills past their due date (requires immediate attention)
  • To Pay — posted bills not yet paid
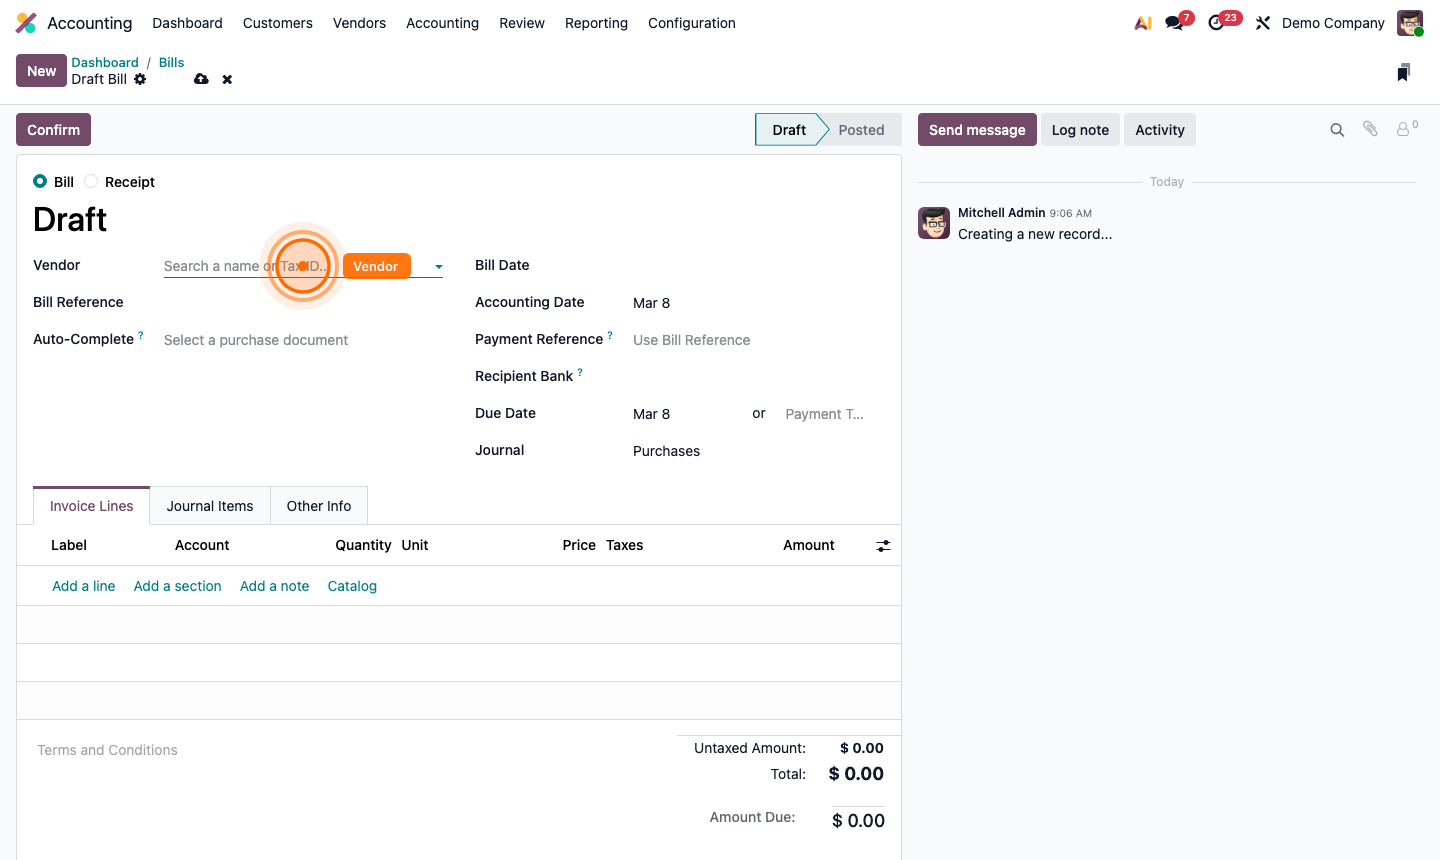
  • Draft — bills awaiting review and confirmation

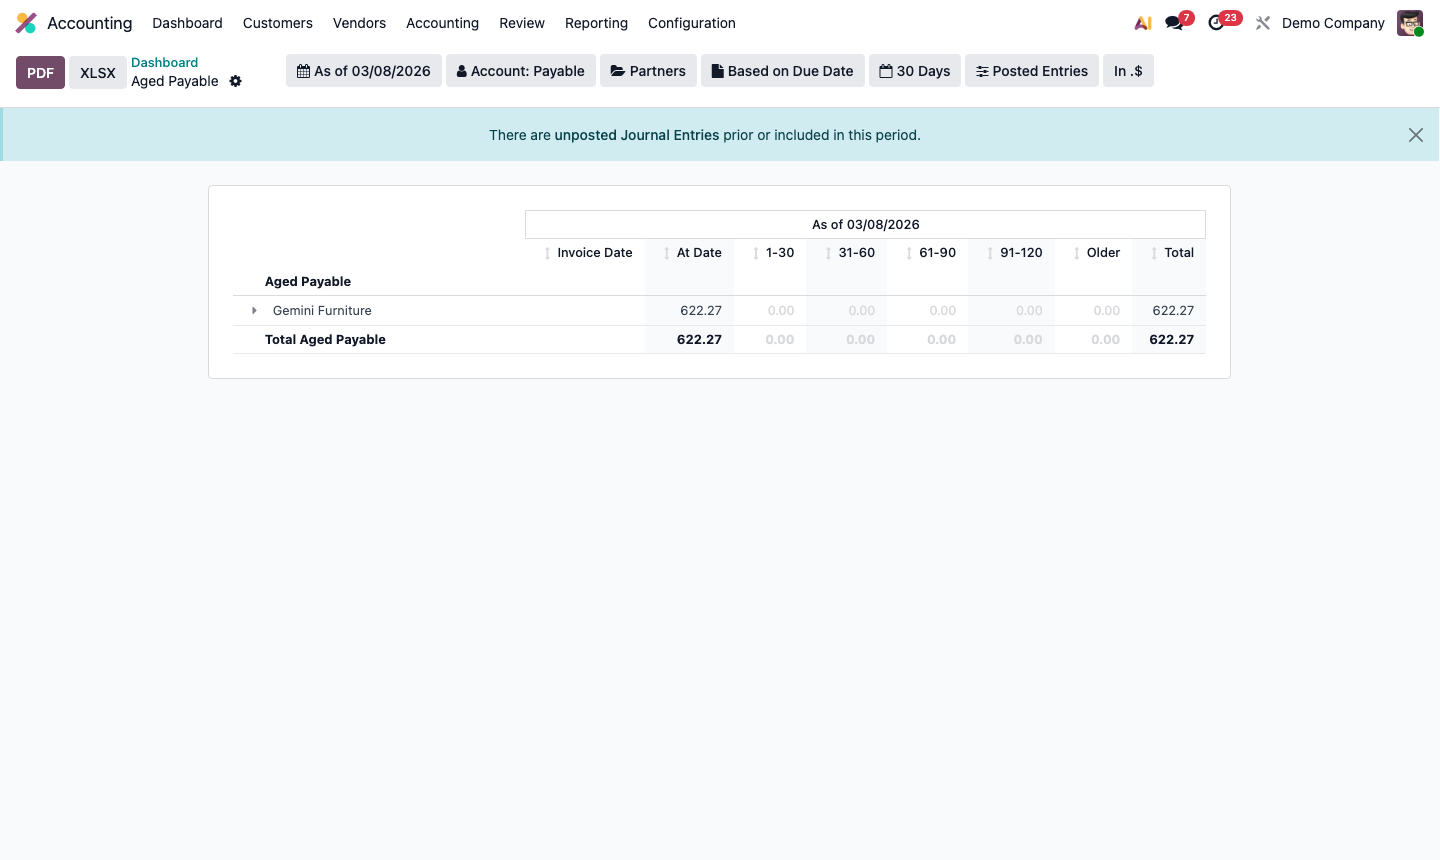
The Aged Payables report (Accounting → Reporting → Aged Payable) gives the best summary of what you owe and when.

Step 1: Vendor bills list showing status badges, due dates, and amount due columns

2

Create a Vendor Bill Manually

Click New. Fill in the bill form:

  • Vendor — select from Contacts (or create inline)
  • Bill Date — the date on the vendor’s invoice
  • Accounting Date — the period this bill affects in your books (defaults to bill date)
  • Bill Reference — the vendor’s own invoice number (critical for matching)
  • Due Date — calculated automatically from Payment Terms, or enter manually
  • Journal — usually “Vendor Bills”

In the Invoice Lines tab, click Add a line:

  • Product — links to your chart of accounts via the product’s expense account
  • Account — the expense GL account (e.g., 6001 – Office Supplies)
  • Taxes — auto-applied from the product/vendor settings
  • Quantity and Price

Step 2: New vendor bill form showing vendor, bill reference, due date, and line items

3

Use AI Document Scanning

Instead of manual entry, upload vendor invoices and let Odoo extract the data automatically.

On the Vendor Bills list, click Upload. Drop a PDF or image file.

Odoo’s AI scans the document and auto-fills:

  • Vendor name and VAT number
  • Invoice date and reference number
  • Line items, quantities, and prices
  • Tax amounts

Review the extracted data, make corrections if needed, and click Confirm.

Step 3: Bill upload interface showing AI-extracted fields from a scanned PDF invoice

4

Confirm and Post the Bill

After reviewing the bill, click Confirm.

  • Status changes to Posted
  • A bill number is assigned (e.g., BILL/2026/00034)
  • Journal entries are created automatically (debit expense account, credit accounts payable)
  • The bill is locked — fields like vendor, date, and amounts cannot be changed

If you need to correct a posted bill before paying, click Reset to Draft.

Step 4: Posted vendor bill with assigned bill number and journal entries preview

5

Register Payment

When you pay the vendor:

  1. Open the posted bill.
  2. Click Register Payment.
  3. Confirm:
    • Journal — the bank account or cash journal you’re paying from
    • Payment Date — the actual payment date
    • Amount — defaults to the full outstanding balance
    • Memo — your payment reference (e.g., wire transfer ID, cheque number)
  4. Click Pay.

The bill status changes to In Payment (until bank reconciliation) and then to Paid.

For batch payments — paying multiple vendors at once — go to Accounting → Vendors → Payments and create a batch.

Step 5: Register payment dialog for vendor bill with journal, date, and amount fields

6

Set Up Payment Terms

Payment terms automate due date calculation and can split amounts across multiple due dates.

Go to Accounting → Configuration → Payment Terms. Click New:

  • Name — e.g., “Net 30”, “2/10 Net 30”, “50% Upfront 50% on Delivery”
  • Note — displayed on the vendor bill
  • Terms tab — add lines for each payment:
    • Type: Balance (remaining amount), Fixed amount, or Percentage
    • Days: offset from the bill date
    • Day of the month: payment due on a specific day (e.g., last day of month)

For “2/10 Net 30” (2% discount if paid within 10 days, otherwise full payment in 30):

  • Line 1: 98% due in 10 days
  • Line 2: Balance due in 30 days

Assign the payment terms to vendors so all their bills auto-calculate due dates correctly.

Step 6: Payment terms form showing 50% upfront and 50% delivery split term configuration

7

Review Aged Payables

The Aged Payable report is your primary AP management tool.

Go to Accounting → Reporting → Aged Payable.

The report shows all outstanding vendor bills bucketed by age:

  • Current (not yet due)
  • 0-30 days overdue
  • 31-60 days overdue
  • 61-90 days overdue
  • 90+ days overdue

Sort by Total (descending) to prioritise your largest outstanding balances. Use this report weekly to ensure you’re not missing payment deadlines that could damage vendor relationships.

Step 7: Aged payable report showing vendor balances by age buckets