Skip to content
Settings

Security & Permissions

Settings

Security & Permissions

Configure password policies, two-factor authentication, access groups, and record-level rules to protect your Odoo data.

6 steps Updated Mar 7, 2026 SOP · Standard

Odoo’s security model operates on three levels: user groups (what modules a user can access), record rules (which records they can see), and field-level security (which fields are visible). This guide covers the practical controls every administrator should configure before going live.

1

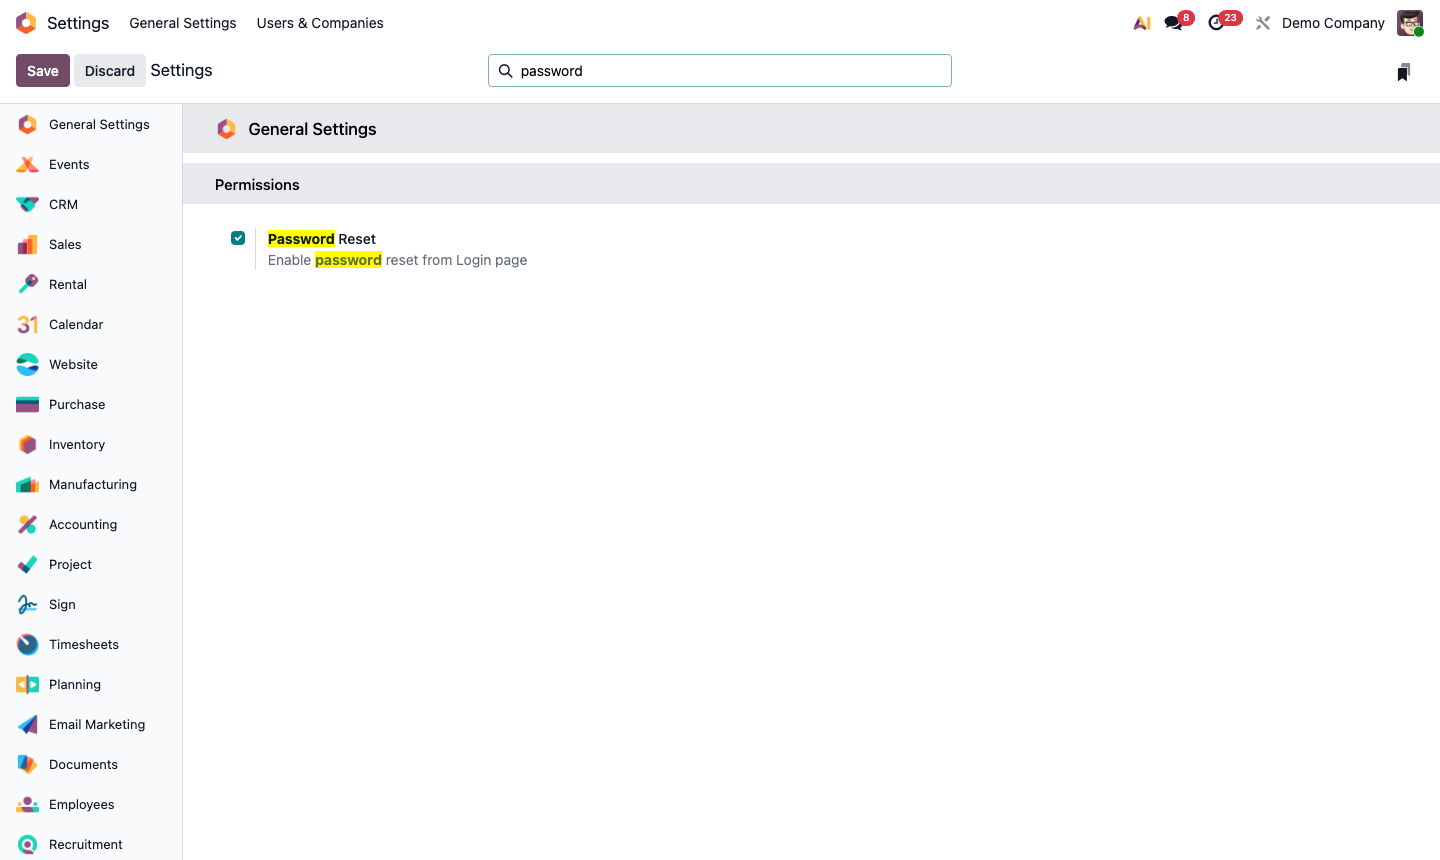
Set Password Policies

Go to Settings → Permissions (or search “Password” in Settings).

Configure:

  • Minimum Password Length — recommended 10+ characters
  • Password Reset — allow users to reset via email, or require admin action
  • Session Expiry — how long before inactive sessions are logged out (e.g., 1 week)

For higher security environments, enable Lock Account After Failed Attempts to prevent brute-force logins.

Step 1: Settings security section showing password policy, session expiry, and lock settings

2

Enable Two-Factor Authentication (2FA)

Go to Settings → Permissions → Two-Factor Authentication.

Options:

  • Optional — users can enable 2FA themselves
  • Required for administrators — forces 2FA only on admin accounts
  • Required for all users — enforces 2FA across the entire company

After enabling 2FA, users are prompted on next login to set up an authenticator app (Google Authenticator, Authy, etc.). They scan a QR code and enter the verification code.

Step 2: Two-factor authentication settings showing enforcement level options

3

Understand Access Groups

Access groups control which apps and features each user can access. Every user is assigned one or more groups per module.

Go to Settings → Users and open any user. The Access Rights tab shows their groups per module, e.g.:

  • Sales: User / Administrator
  • Accounting: Billing / Accountant / Administrator
  • Inventory: User / Administrator

Key principle: assign the minimum group needed. A salesperson needs “Sales: User” not “Sales: Administrator”.

Step 3: User access rights tab showing module-level group assignments

4

Configure Record Rules (Row-Level Security)

Record rules restrict which rows a user can read, write, or delete. For example: a salesperson can only see their own opportunities.

Go to Settings → Technical → Security → Record Rules (enable developer mode first via Settings → Developer Tools → Activate Developer Mode).

Each rule has:

  • Model — which table it applies to (e.g., crm.lead)
  • Domain — a filter expression (e.g., [('user_id', '=', user.id)])
  • Groups — which access group the rule applies to
  • Permissions — read, write, create, delete

Step 4: Record rules list showing domain filters and group restrictions for crm.lead model

5

Manage API Keys

For integrations and automation, use API keys instead of passwords.

Go to Settings → Technical → API Keys (or user profile → API Keys).

Click New API Key:

  • Give it a descriptive name (e.g., “Zapier Integration”, “Mobile App”)
  • Copy the key immediately — it’s only shown once
  • The key grants access with the same permissions as the user who created it

To revoke access, delete the API key. The integration immediately loses access without changing the user’s password.

Step 5: API keys list with name, created date, and action to generate a new key

6

Audit the Access Log

Odoo logs authentication events and can log all data changes for compliance.

Authentication log: Go to Settings → Technical → Logging → Requests Logging or check your server logs for login/logout events.

Chatter log: Every record change (field edits, stage moves, status updates) is automatically logged in the chatter with the user, timestamp, and changed values — no configuration needed.

Enable detailed logging: In Settings → Technical → Actions → Server Actions, you can create automated rules that notify admins of sensitive changes (e.g., a user deleting a confirmed invoice).

Step 6: Chatter log on a record showing field change history with user and timestamp