Skip to content
Sales

Customer Portal & Signatures

Sales

Customer Portal & Signatures

Let customers view quotes, sign contracts digitally, make online payments, and track their orders through the self-service portal.

6 steps Updated Mar 7, 2026 SOP · Standard

The customer portal gives your customers a self-service interface to view their quotes, sign proposals digitally, make payments, and track open orders — all without calling your team. This guide covers enabling the portal, sending portal invitations, and using electronic signatures.

1

Enable the Customer Portal

The portal is enabled by default when the Website or Sales module is installed. To confirm:

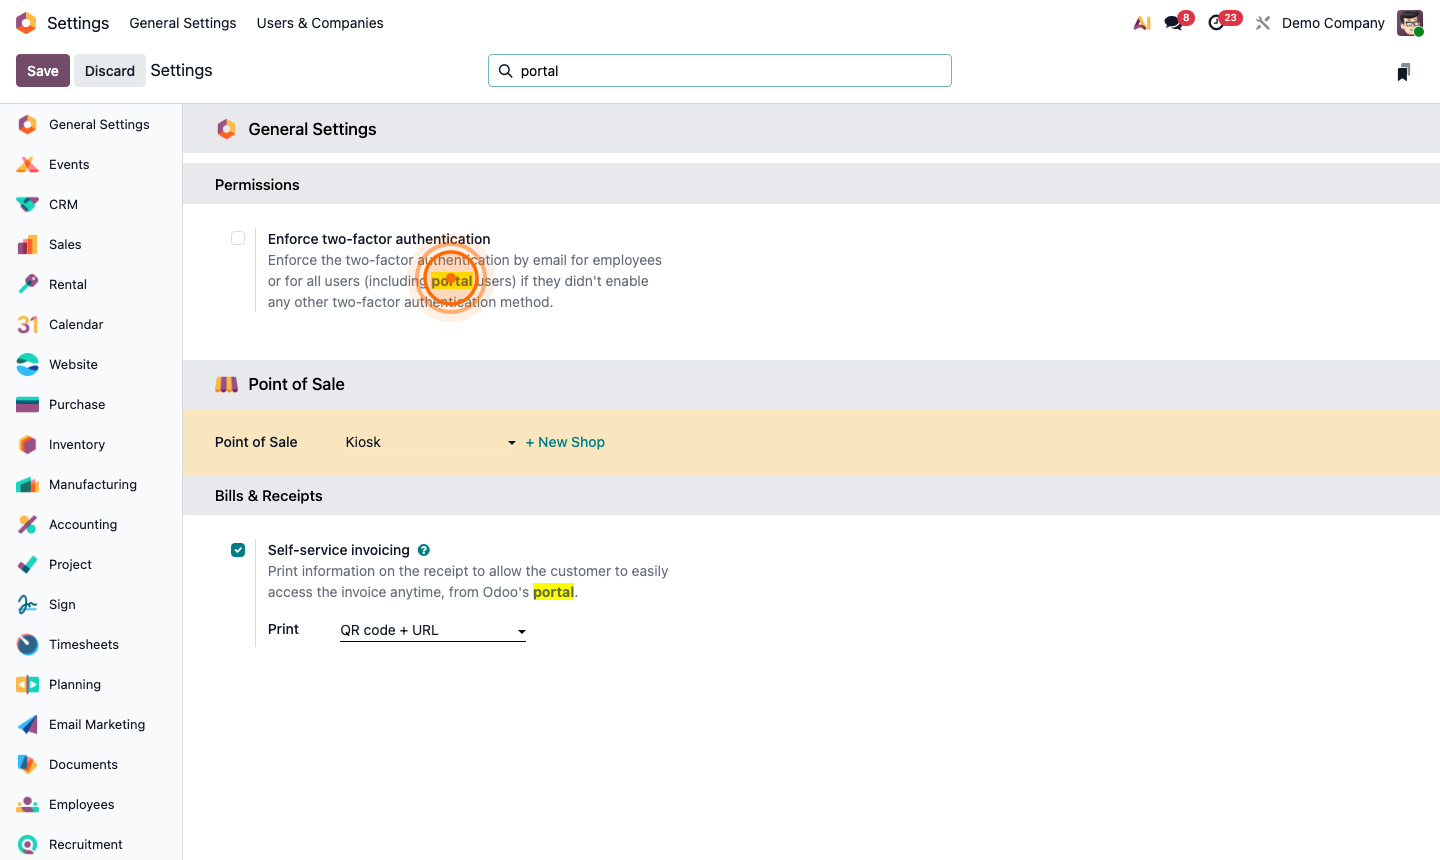
Go to Settings → General Settings → Permissions. Ensure Customer Portal is enabled.

When portal is active:

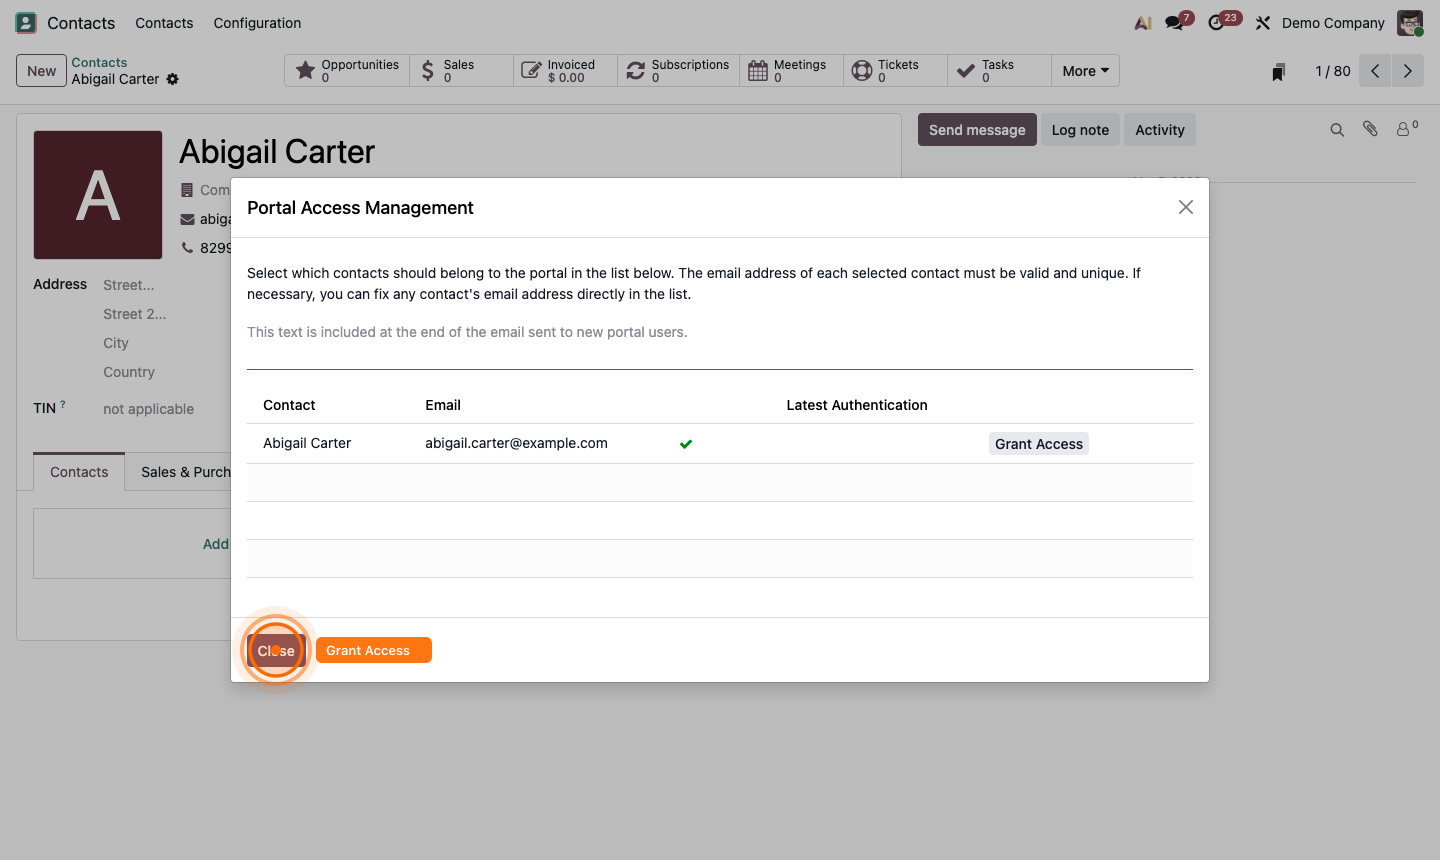
  • Customers receive a portal link when you send them a quote or invoice
  • They can log in at yourcompany.odoo.com/web/login using their email
  • Their portal shows all documents linked to their contact: quotes, orders, invoices, delivery notes, helpdesk tickets

Step 1: Settings Permissions section showing Customer Portal option enabled

2

Grant Portal Access to a Customer

Not all contacts automatically get portal access. You grant it explicitly.

Go to a customer’s contact record. Click Action → Grant Portal Access.

A dialog shows the email addresses linked to this contact. Select which individuals should receive portal access and click Grant Access. They receive an email invitation to set up their portal password.

You can also revoke access from the same menu (Action → Revoke Portal Access) if a customer should no longer have visibility into your records.

Step 2: Grant portal access dialog showing customer email and grant/revoke option

3

Send a Quote via Portal Link

When you send a quotation by email (click Send on a quotation), the email includes a View Quotation button linking to the portal view.

The portal quote shows:

  • Your company logo and branding
  • Line items, quantities, and prices
  • Terms and conditions
  • An Accept & Sign button for digital signature
  • A Pay Now button (if online payment is configured)
  • A message thread so the customer can ask questions

Customers can also download the quote as a PDF directly from the portal.

Step 3: Customer portal view of a quotation with Accept & Sign and Pay Now buttons

4

Enable Electronic Signatures

Electronic signatures let customers accept quotes directly in the portal without printing.

Go to Sales → Configuration → Settings. Enable Electronic Signature under the Quotations & Orders section.

When enabled:

  • The Sign button appears on the portal quotation view
  • The customer draws or types their signature
  • On signing, the quotation status updates to Quotation Sent → Signed
  • Both parties receive a signed PDF copy by email

The signature is legally binding in most jurisdictions and creates an audit trail in Odoo.

Step 4: Portal quotation with electronic signature panel showing draw/type signature area

5

Accept Online Payments on Quotes

Enable customers to pay deposits or full amounts at quote acceptance.

Go to Sales → Configuration → Settings → Online Payment. Enable it and select your payment providers (Stripe, PayPal, Adyen, etc.).

On the quotation form, set a Down Payment amount if you want a deposit rather than full payment. The portal will collect the specified amount.

When the customer pays:

  • An invoice is automatically created for the payment amount
  • The payment is registered and reconciled
  • The sales order is confirmed automatically

Step 5: Sales settings showing Online Payment option and payment provider selection

6

Monitor Portal Activity

Track what customers have done with their quotes from within Odoo.

On any quotation, the chatter records:

  • When the portal email was sent
  • When the customer viewed the quote (with timestamp)
  • When they signed or rejected
  • Any messages they sent from the portal

The quotation status reflects portal actions:

  • QuotationQuotation Sent (after email sent) → Sales Order (after signed/confirmed)

To see all portal users and their activity, go to Settings → Users and filter by User Type → Portal.

Step 6: Quotation chatter showing portal view event, signature logged, and payment confirmation